
What is BungeeCord?
BungeeCord is not a playable server, but instead considered a Proxy. This proxy server acts as a link between multiple minecraft servers. This allows players to transfer between servers without having to disconnect. BungeeCord plugins can be added to the BungeeCord server allowing functions such as cross server messaging and portals to transfer between servers. Although BungeeCord was developed by the Spigot team, but requires BungeeCord specific plugins. You cannot use plugins from Spigot, Craftbukkit or other mods.
Although you may connect directly to the BungeeCord server address, players cannot actually exist on the server. Player data will be directly transferred to the designated lobby server. If no servers are connected to BungeeCord, then players will be disconnected immediately after joining.
How do I setup a BungeeCord server?
For a BungeeCord server to work, you will need a minimum of two other servers, apart from BungeeCord. Often a lobby server and then one or more playable servers. Servers connected together with BungeeCord will need to be running Spigot. Please follow the instructions here if you need help setting up a Spigot server. If a server is already running Spigot-CraftBukkit, it will need to be swapped to Spigot.
Prep the servers you will be connecting with BungeeCord
- Note — This only applies to servers running Spigot.
- Open your game server panel and select the server you will be modifying.
- Optional: Across the top of your screen, select the “Backups” header. Press the “Create Backup” button. Let the backup process complete. This will provide a restore point in case you mess up editing the config files

- Across the top of your screen, select the “Files” header.
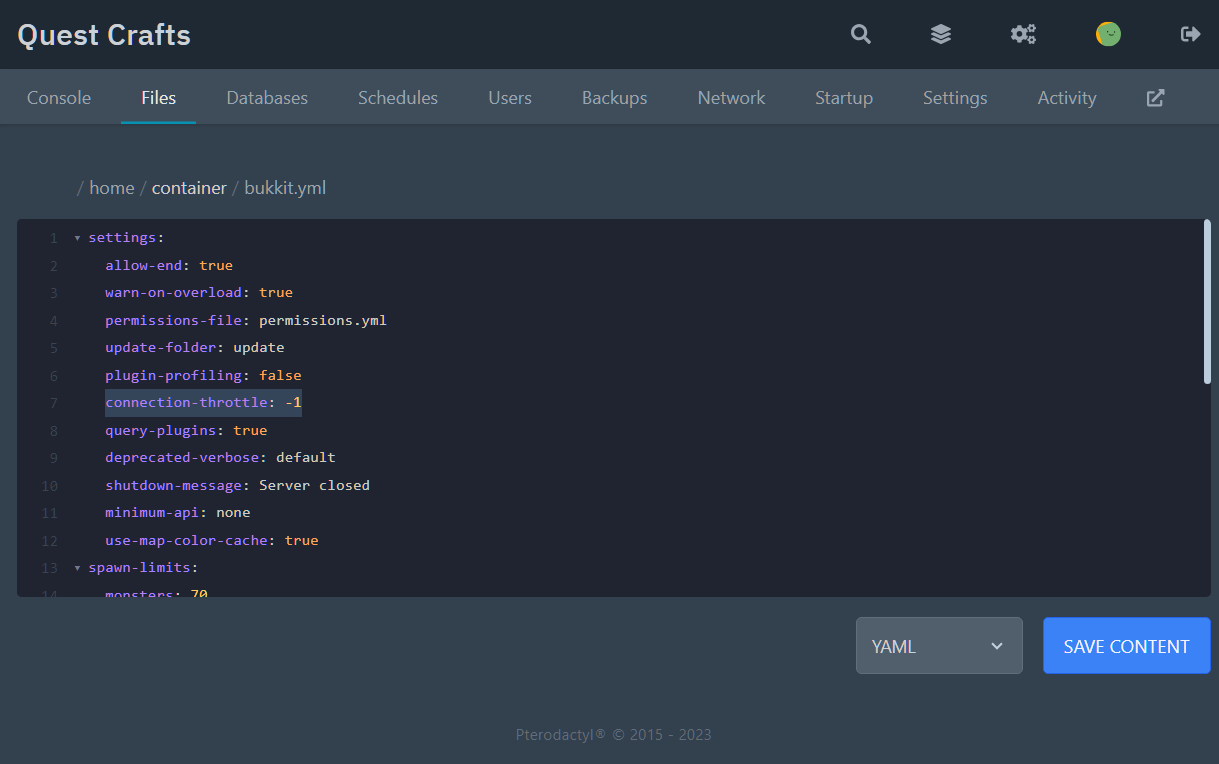
- Click on the file “bukkit.yml” to open the editor.
- View the value for line 7 connection-throttle:
- The default value is 4000. Delete the value and set the new value to -1
- Check that YAML is indicated on the bottom right and then select “SAVE CONTENT”
- Across the top of your screen, select the “Files” header.
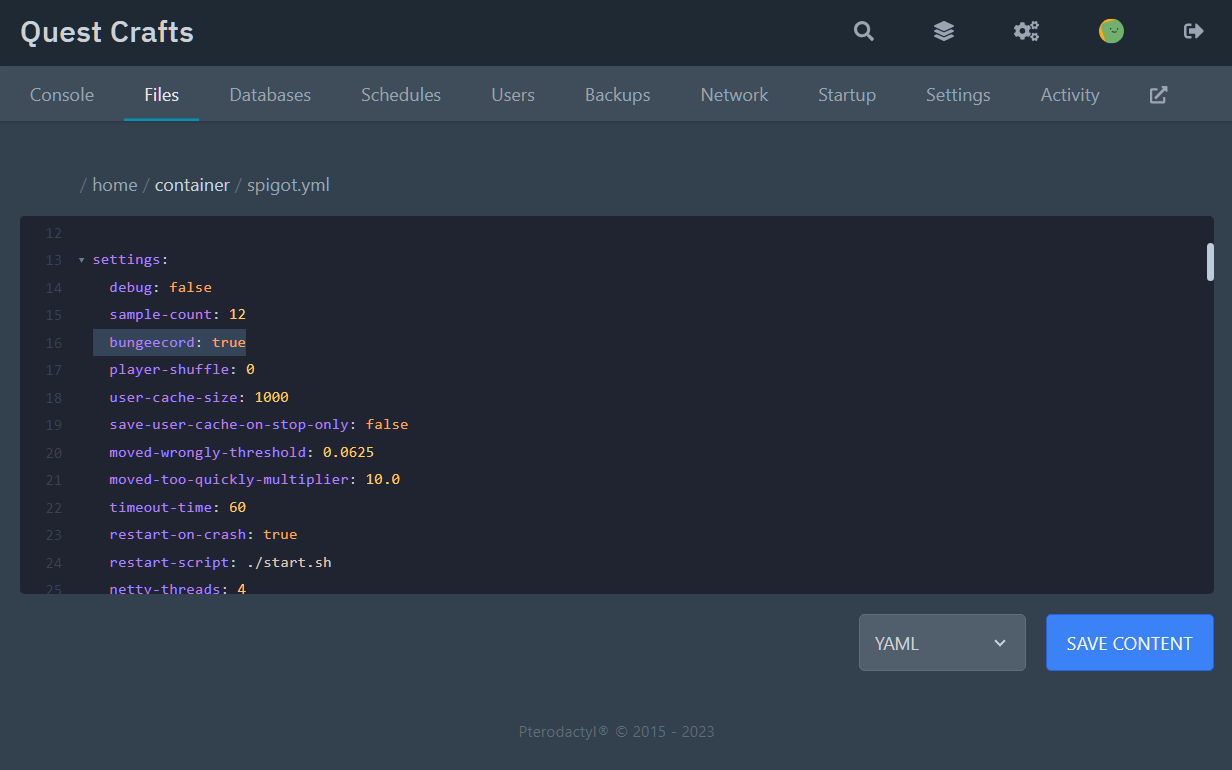
- Click on the file “spigot.yml” to open the editor.
- Look for bungeecord: on line 16. Change the value from “false” to “true”
- Check that YAML is indicated on the bottom right and then select “SAVE CONTENT”
- Across the top of your screen, select the “Files” header.
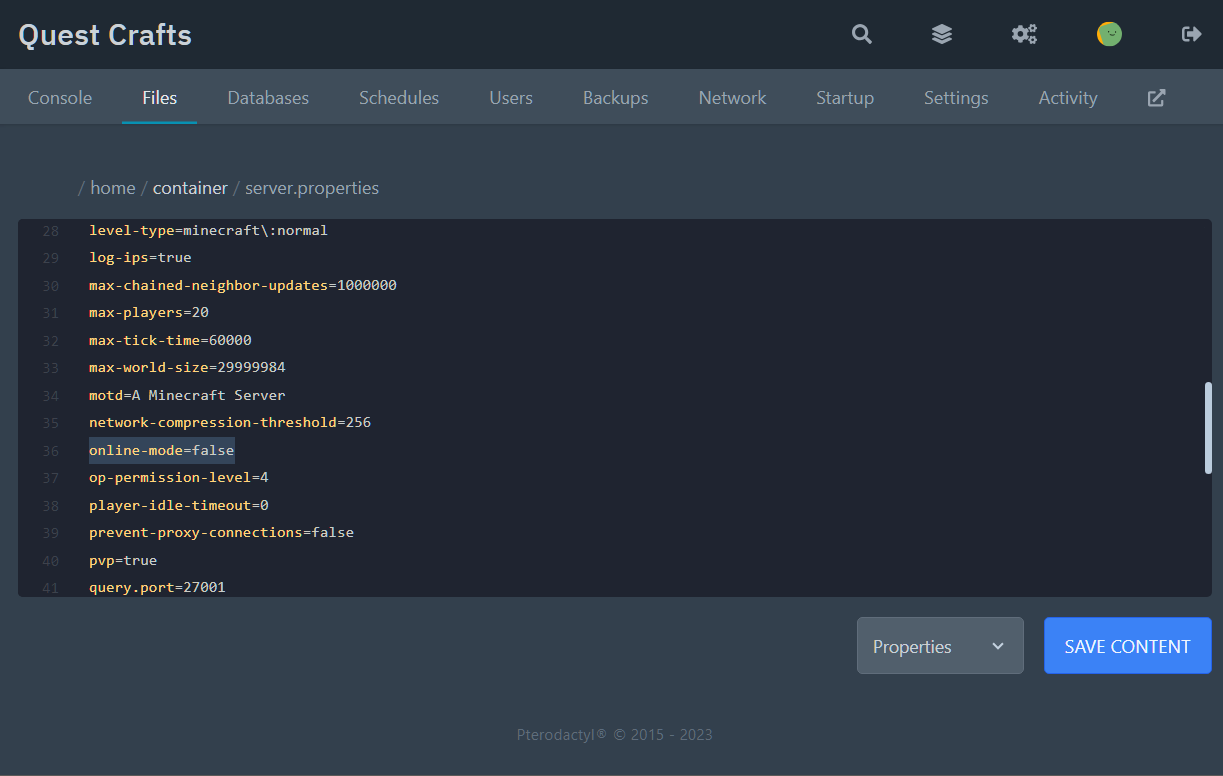
- Click on the file “server.properties” to open the editor.
- Scroll down to line 36 and change online-mode= from “true” to “false”
- Check that Properties is indicated on the bottom right and then select “SAVE CONTENT”
- Across the top of your screen, select the “Console” header. Click Restart on the top right.
Install your BungeeCord Server
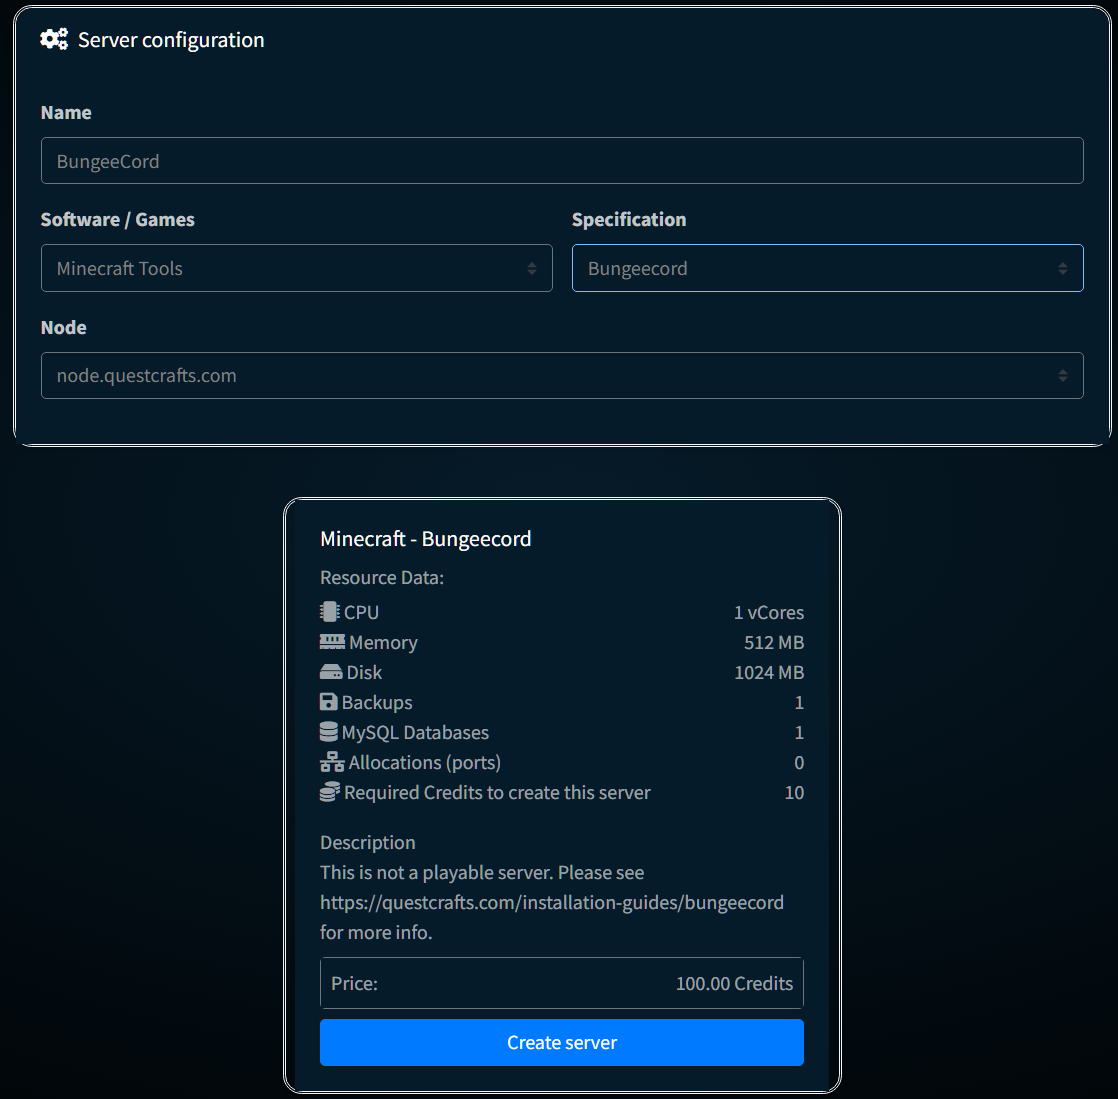
- From the host site under servers, select “Create Server”.
- Choose an appropriate name that will let you distinguish this server from others.
- In the “Software / Games” dropdown, select Minecraft Tools and the Select BungeeCord under “Specification”
- Select “Create Server” on the desired plan. – Note there may be limited plan choices as BungeeCord requires very few resources to run.
- You will be taken back to the servers page. Please select “Manage” under your newly created BungeeCord server.
- You will be redirected to your server’s Dashboard. Pre-installation will have already started. Press “Start” on the top right to complete installation and start the service.
- Once installation is complete and you see “Server marked as running…” in the console, select “Stop” from the top right to Stop the service.
- Now we will start and stop the server once more. Select “Start” once more to verify all updates have been downloaded. Confirm you see “Server marked as running…” in the console, select “Stop” from the top right to Stop the service.

- Optional: Across the top of your screen, select the “Backups” header. Press the “Create Backup” button. Let the backup process complete. This will provide a restore point in case you mess up editing the config files
- Across the top of your screen, select the “Files” header.
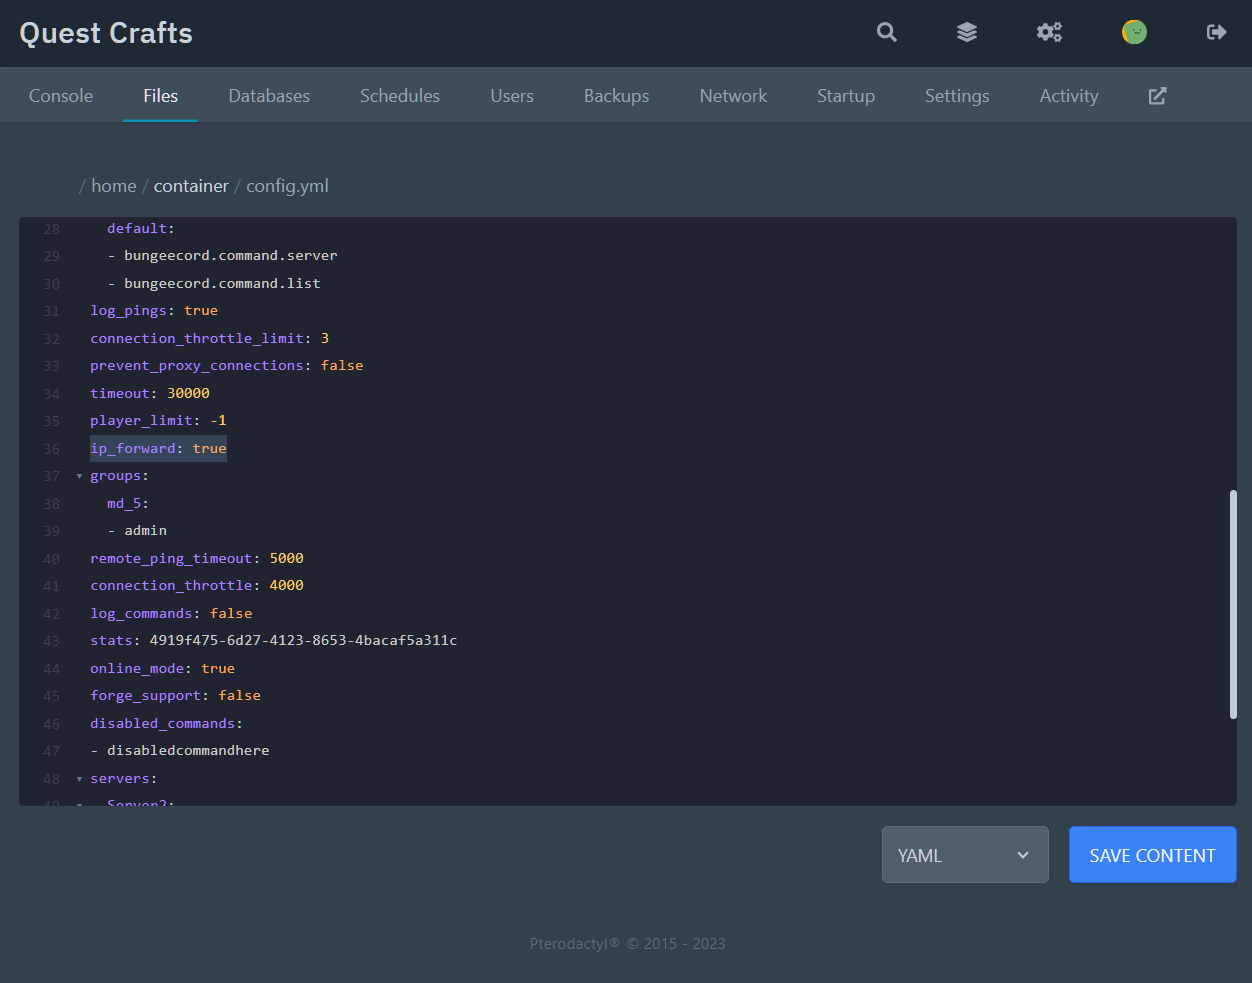
- Click on the file “config.yml” to open the editor.
- If you have followed along and the server has performed the second start/stop process, you should see the value for ip_forward: on line 36. Change it from “false” to “true” (if not, start and stop the server again)
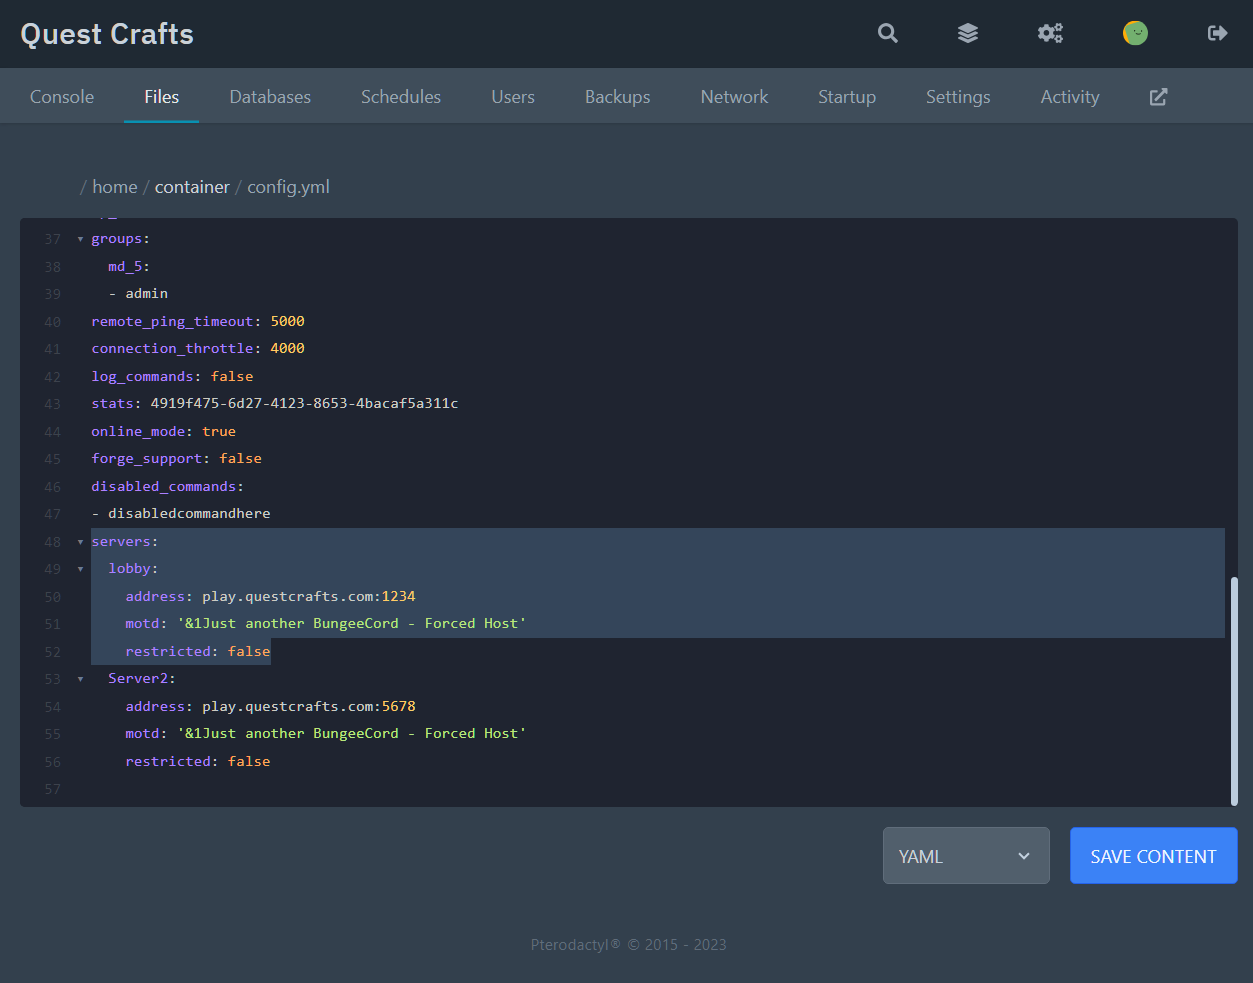
- Now scroll down to servers: on line 48
- Highlight line 48 all the way down to 53.
- Right click and select copy. Now select line 53 and paste.
- You should have duplicated these lines:
lobby:
address: localhost:25565
motd: '&1Just another BungeeCord - Forced Host'
restricted: false - Replace lobby: on line 53 with Server2: — Note this name will identify the server in game. You can use a different name such as “Mini_Games:” or “PVP_Arena:” instead of “lobby:” and “Server2:” (Try at your own risk)
- On line 50, replace: localhost:25565 with your lobby or first server URL/IP. For example play.questcrafts.com:1234
- On line 55, replace: localhost:25565 with your second server URL/IP. For example play.questcrafts.com:5678
- You can find your URL/IP in the top right of the “Console” page.
- You may repeat theses steps to add “Server3, Server4, ect”
- Check that YAML is indicated on the bottom right and then select “SAVE CONTENT”
- Across the top of your screen, select the “Console” header. Press Start.
Installation is complete. Please connect to the URL/IP of the BungeeCord server.
Please visit the Official BungeeCord Site for more info.