What is a Limbo Minecraft Server
Minecraft limbo is a small server designed to be used with Proxy Servers such as BungeeCord to link it to a main server.
- Limbo can act as a lobby or landing zone to separate main servers or used as an authentication server for guests to join before they are added to a whitelist.
- What about a jail to hold suspect players for questioning.
- Maybe a social zone for AFK players or used as a chatroom/waiting room.
- Use limbo as an OP/Mod only hangout?
- Since a custom server tier has been created specifically for Limbo servers with a reduced credit cost, limbo servers can be even be spun up to act as instanced player homes.
Limbo comes installed with a sample world, but custom worlds can be created and dropped into the Limbo folder. It supports plugins designed for Craftbukkit/Spigot. It functions as a standalone backend server in a BungeeCord network, offering flexibility. Built for Minecraft version 1.20.2, it supports player skins, allows schematic loading, and provides an API for customization.
Quick Setup instructions
- Create a new server and then click manage or select the server from panel.questcrafts.com
- Once the Pre-installation completes, click Start to begin the installation.
- Once the Install is complete, please restart the server to assure all updates are installed.
- Your server is now ready to play. Use use the address indicated in the top right of the screen.
What do I do first after setting up my server
Setup your spawn
Limbo can use .schem files to import pre-constructed worlds. These files can be created or downloaded online.
- Before modifying your server, it is a good idea to create a backup. See the FAQ section for info on creating and restoring backups
- Navigate to your dashboard by visiting panel.questcrafts.com
- Click on your Limbo server
- Click the red Stop button to shutdown your server.
- Once you see “Server marked as offline…” select the “Files” header
- Locate the file spawn.schem
- Click on the three dots to the far right of the file and select Rename from the drop down
- Rename spawn.schem to spawn.schem.bak
- Now upload your new .schem file and rename it to spawn.schem
- Select the “Console” header and press the blue Start button.
Adjust your server properties
It is a good idea to go over your server properties file before starting a server
- Before modifying your server, it is a good idea to create a backup. See the FAQ section for info on creating and restoring backups
- Navigate to your dashboard by visiting panel.questcrafts.com
- Click on your Limbo server
- Click the red Stop button to shutdown your server.
- Once you see “Server marked as offline…” select the “Files” header
- Click on the file server.properties
A few properties you may be interested in checking is
- Line 5: default-gamemode=
Creative or Spectator are good options for Limbo. Most other modes may not play well - Line 13: bungeecord=
Are you using Bungeecord or another proxy server? See our bungeecord guide for more info - Line 18: world-spawn=
This may need to be changed if you have replaced your spawn.schem file - Line 20: allow-chat=
Should players be able to chat? - Line 24: bungee-guard=
Are you using the BungeeGuard plugin to secure your server? - Line 27: enforce-whitelist=
Should this server use a whitelist? - Line 30: allow-flight=
Can players fly?
More info
Please visit our this guide for some of the first things to do with your server. This is where you can find info on how to setup a whitelist so only your friends can join or how to install your first mod. Or general info on how to navigate the dashboard panel.
Limbo specific support can be found on the official resource page: Limbo
If you need further setup support please see the step by step installation instructions below or open a Support Ticket
Step by Step Instructions
- From the host site under servers, select “Create Server”.
- Choose an appropriate name that will let you distinguish this server from others.
- In the “Software / Games” dropdown, select Minecraft and the Select Limbo under “Specification”
- Select “Create Server” in the box with your desired server specs.
- Note credits will be deducted once you press create server with the amount equal to 1 hours worth of the total price. See FAQs for more info.
- You will be taken back to the servers page. Please select “Manage” under your newly created Limbo server.
- Next, you will be redirected to your server’s dashboard where the pre-installation will have begun.
- Please wait until the server installation is finished before moving on. This process usually takes around a minute to complete from the time you pressed “Create Server”.
- You will know when this is done when you see that 100% has transferred and 100% has been received.
- If you have closed or refreshed the page, you may instead see, “container@pterodactyl~ Server marked as offline…”
- Both are indications that the server has installed correctly.
- See examples below:

- Now that the pre-installation is complete, press “Start” on the top right to finalize the installation and load all the resources.
- When the world building is complete and you see “Server marked as running…”
- If you have closed or refreshed the page, you may see “Limbo server listening on /0.0.0.0:port#”
- It is recommended that we stop and start the server once more to verify all updates have been downloaded. Press the Red “Stop” button in the top right corner.
- Wait for the server to save and confirm you see, “container@pterodactyl~ Server marked as offline…”
- Now press the blue “Start” button and let the server start up. Confirm you see “Server marked as running…” or “Limbo server listening on /0.0.0.0:port#” in the console.
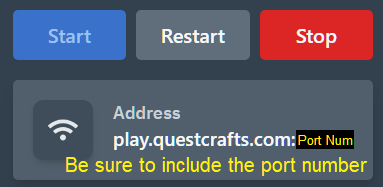
- Your server is now ready to join. Use the address located below the Start / Restart / Stop buttons to connect to the server. Clicking the address will copy it to your clipboard. — Be sure to include the port number. This number distinguishes your server from other servers.