What is Sponge – Forge
SpongeForge is a powerful Minecraft server platform combining Forge and SpongeAPI. Choose SpongeForge for its versatile modding capabilities, compatibility with Forge mods, and advanced plugin support. It’s an ideal option for players seeking a server with both Forge and Sponge features, enabling a wide range of modding possibilities.
Some Sponge – Forge mods will require the use of a custom launcher. See our “Extra Resources” page for more info on Minecraft Launchers
Quick Setup instructions
- Create a new server and then click manage or select the server from panel.questcrafts.com
- Once the Pre-installation completes, click Start to begin the installation.
- Accept the EULA and let install finish.
- Once the Install is complete, please restart the server to assure all updates are installed.
- Your server is now ready to play. Use use the address indicated in the top right of the screen.
What do I do first after setting up my server
Please visit our this guide for more info on initial server setup. This is where you can find info on how to setup a whitelist so only your friends can join or how to install your first mod. Or general info on how to navigate the dashboard panel.
If you need further support please open a Support Ticket
Visit Sponge Powered official site: spongepowered.org for resources and documentation
Step by Step Instructions
- From the host site under servers, select “Create Server”.
- Choose an appropriate name that will let you distinguish this server from others.
- In the “Software / Games” dropdown, select Minecraft and the Select Sponge – Forge under “Specification”
- Select “Create Server” on the desired plan.
- Note credits will be deducted once you press create server with the amount equal to 1 hours worth of the total price. See FAQs for more info
- You will be taken back to the servers page. Please select “Manage” under your newly created Sponge – Forge server.
- You will be redirected to your server’s Dashboard. Pre-installation will have already started. Please wait until Server installation is finished before moving on. This usually takes less than 2 minutes to complete from the time you pressed “Create Server”.
- You will know when this is done when you see the text, “Installation for SpongeForge is Complete”
- If you have closed or refreshed the page, you may instead see, “container@pterodactyl~ Server marked as offline…” Both are indications that the server has installed correctly.
- Se Examples below


- Now that the pre-installation is complete, press “Start” on the top right to finalize the installation and load all the resources.
- You will be prompted with the the Minecraft EULA will pop up in a window within the first minute. This must be accepted before any further installation is allowed to take place.

- After you have accepted the EULA, the server will begin building assets and preparing the world. This process can take a couple minutes.
- When the world building is complete and you see “Server marked as running…”
- If you have closed or refreshed the page, you may instead see, “Done (Numbers)! For help, type “help” or “?”” “Done (Numbers)! For help, type “help” or “?””
- It is recommended that we stop and start the server once more to verify all updates have been downloaded. Press the Red “Stop” button in the top right corner.
- Wait for the server to save and confirm you see, “container@pterodactyl~ Server marked as offline…”
- Now press the blue “Start” button and let the server start up. Confirm you see “Server marked as running…” or “Done (Numbers)! For help, type “help” or “?”” in the console.
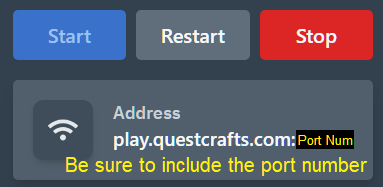
- Your server is now ready to join. Use the address located below the Start / Restart / Stop buttons to connect to the server. Clicking the address will copy it to your clipboard. — Be sure to include the port number. This number distinguishes your server from other servers.